Last Updated on January 13, 2022 by admins
Every aquarium looks better with rocks at the bottom. This article will teach you all details necessary to make DIY rocks for a Freshwater Aquarium.
DIY stands for Doing- It- Yourself. Doing things on your own is a great way to build skills, save money, and help our planet. If you landed on this article, you are most likely interested in learning new skills for your aquarium.
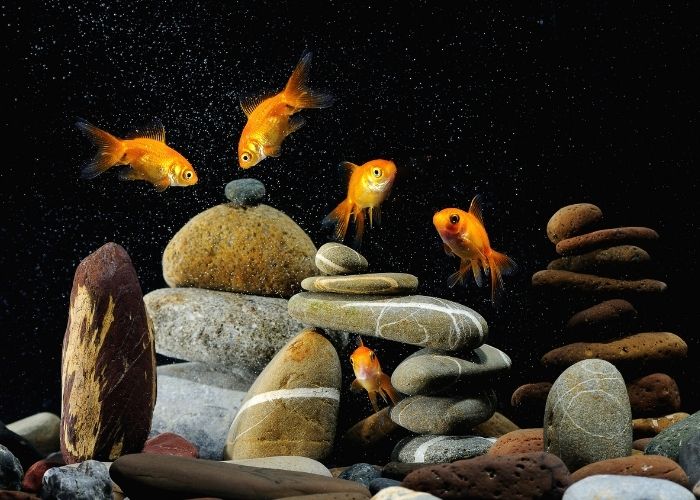
Rocks are a necessary part of any fish tank for many reasons. First off, it created a substrate for the bottom of the tank. This is necessary for plants to grow in.
The roots of plants grow down into the rocks and are held into place this way.
Rocks also provide a great environment for your fish. Many fish like to hide and lay underneath large rocks. By putting rocks in your tank, you are simulating the natural environment.
This means that creating a good environment with rocks and plants can even improve the health of your fish!
However, buying rocks can be expensive. So many people like to make DIY rocks for a freshwater aquarium. This saves your money and gives you a lot of room for creativity.
Continue reading this article now to find out exactly how to make DIY rocks for a freshwater aquarium.
Making Your Own Aquarium Safe Rocks
If you decide to make your own rocks, there are some important things you should know before getting started.
First off, these rocks will be going directly into your tank water and interacting with your fish. This means that if the rocks have any chemicals or something that can affect the water health, your fish can be in danger.
You need to make sure the material you use to make the rocks are safe for an aquarium! Stick to non-toxic materials for your DIY rocks for a freshwater aquarium.
Another thing to consider is that you do want to make sure your homemade rocks do not affect the PH of the water. The PH of the water is crucial to the health of your tank ecosystem.
To be extra safe, make the rocks and put them into your tank water before adding fish and plants. Once the rocks are sitting in the water for a few days, measure the PH to make sure it is not affecting it.
Since you are making the rocks by yourself, there is tons of room for creativity. Any shape you can make with your hand is possible! People get very creative and make things like tall rock columns or canyon-type things for the fish to swim through.
Now, we will get into the details of making the DIY rocks for a freshwater aquarium.
Read more about How to Make Your Own Aquarium Decorations?
Details On How To Make Aquarium Rocks
Firstly, you will need to find the material for making the rocks. The best material we have found for this project is Type 3 Portland Cement. This product is easily available at most construction stores.
The second material you will need is sand. This is because in order to mix cement, you have to add sand. Typically sand will be sold right next to the cement at the hardware store.
Once you have secured the cement and sand, you can begin to mix them. Before mixing, try to draw out which type of rock designs you want to create. This will help you be ready to create as soon as the cement is mixed.
Cement dries fast, and once dried cannot be used again. So keep in mind, once the cement is mixed, you only have a short window to use it.
Mixing cement is not too difficult. Find a container that is OK to get dirty to mix in. Any extra cement that remains in the container will be hard to clean out completely.
Determine how many rocks you need to make based on your tank size. You do not want to overcrowd your tank with rocks. Once you have an accurate idea of your design and needs, you can decide how much cement to mix.
Cement is mixed with the ratio of 3:1 Sand to Cement. This means you need three times the amount of sand than cement. You can easily measure this by using a tool like a cup.
Pour your measured cement and sand into the container and mix it when it’s dry first. Once you have your dry mix, you can start to add water slowly.
Find more information How To Choose A Freshwater Aquarium Safe Paint
Finalizing Your Fake Aquarium Rocks
Do not add too much water at the beginning when mixing your cement. If you add too much water, it will become very liquidy and unable to form shapes.
You can always add more water to something, but it is harder to take water out. You will want the texture to become like a dough. This will be easy for you to make rock formations.
Once you have mixed the ideal texture, you can start to make shapes. The best thing about doing this DIY is that you can make any shape you want! Use your imagination and have fun.
Let the rocks dry for a few days before adding them to your tank. This will ensure that they are ready to be put into water.
Have fun with making DIY rocks for a freshwater Aquarium. You can paint the rocks any color your heart desires. Of course, be careful to use non-toxic paint.
Add your rocks prior to putting your fish in and measure the PH until you feel your water is stable. After that, sit back and enjoy watching your fish play with your creation.
If you make your own rocks, post some pictures to show us the designs you came up with! Feel free to comment and ask questions below.